 SnapFood
Traditional calorie counting fails for a boring reason: friction. Searching a database, guessing whether your bowl is 250 g or 400 g of rice, weighing chicken at 11 pm — most people quit within two weeks. Photo calorie counting removes almost all of that friction. You already photograph food you like. Now the photo does the logging.
How photo calorie counting works
When you take a picture of a meal, the AI does three things in sequence:
- Recognizes the food. It separates the plate into ingredients — grilled chicken, brown rice, avocado, a hollandaise sauce — rather than matching one generic dish name.
- Estimates the portions. Visual cues like plate size, food height and how items overlap are turned into gram estimates for each ingredient.
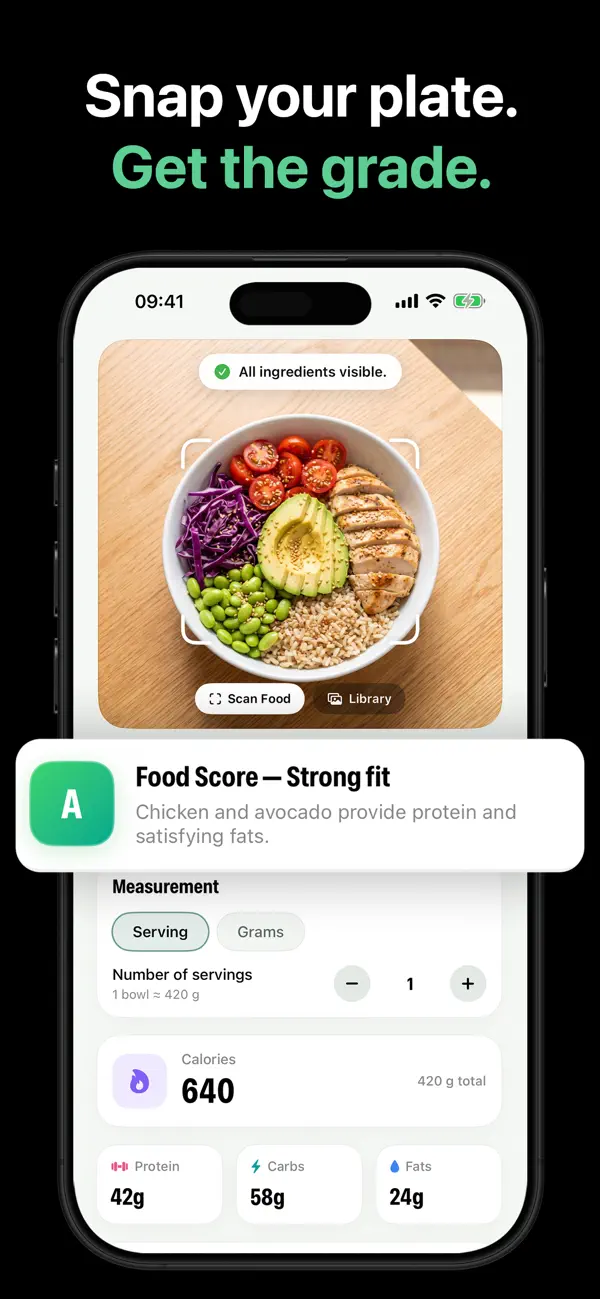
- Calculates the nutrition. Ingredients and portions become calories, protein, carbs and fat — and in SnapFood also fiber, sugar, saturated fat, sodium and micronutrients like iron and vitamin D.
SnapFood adds a fourth step other photo calorie counters skip: it grades the meal from S to D with a one-line reason, so you get a verdict, not just a spreadsheet row. If you're curious how those grades are scored, see food grades explained.
Step by step: counting calories with your camera in SnapFood
- Open the scanner. Tap the green + button and point your phone at the plate. The viewfinder confirms when all ingredients are visible.
- Take the photo. Tap Scan Food. Within seconds you'll see the Food Score, calories, protein, carbs and fat, and the full ingredient list.
- Sanity-check the ingredients. Skim the list. AI reads what it can see — if the rice was fried or there's butter it couldn't spot, you'll fix that next.
- Correct with a sentence. Type or say “the rice was brown” or “add a fried egg”. Nutrition, ingredients and the grade update instantly.
- Adjust the portion. Switch between servings and grams — eat half the bowl, log half the bowl. The grade adjusts with the portion.
- Save it. The meal lands in your day's totals and your Meals Library, so next time it's a one-tap “Log again”.
Six habits that make photo scans more accurate
- Shoot slightly from above. A 45–90° angle shows the whole plate and helps portion estimation.
- Get everything in frame. The drink, the bread, the dipping sauce — if it's part of the meal, include it.
- Use decent light. Daylight or a bright room beats a dim restaurant corner. (If the photo is dark, the ingredient list is where you double-check.)
- Scan before you eat. A full plate carries much more information than a half-eaten one.
- Tell it what it can't see. Cooking oil, sugar in the coffee, mayo inside the sandwich — one sentence fixes hidden calories.
- Don't chase perfection. Estimates within a consistent method beat sporadic “perfect” logs. More on that in how accurate are AI calorie counters.
When a photo isn't the best tool
Photo counting shines on plates, bowls and handheld food. For packaged snacks with a label, the label is already exact — read it and log accordingly. For recipes you cook in bulk, scan one plated serving rather than the whole pot. And if you're eating something fully hidden (a filled pastry, a smoothie someone else made), scan it anyway and then describe what's inside — the correction step exists precisely for this.
Try it on your next meal
SnapFood is free on the App Store and Google Play. Snap your plate and get calories, macros and an honest grade in seconds.
Frequently asked questions
Can you really count calories from a picture?
What makes a food photo easier for the AI to analyze?
Do I have to photograph every single meal?
Nutrition values, grades and recommendations in SnapFood are AI-generated estimates and may be inaccurate. This guide is general information, not medical or dietary advice. Consult a qualified healthcare professional before making health or diet decisions.